Frequently Asked Questions
BASIC / GENERAL QUESTIONS
How do I register my product for warranty?
You will want to start with heading over to our Product Registration page to register your product. Please note that to register your product for warranty, you must have a copy of your receipt. If you no longer have your receipt, we recommend contacting the retailer you purchased the item from for Proof of Purchase.
Once your product is registered, please fill out a Contact Us form to process a warranty claim with our Customer Support team. That same form should be used for any assistance with a product or grilling issue. Response times for claims are usually 3-5 business days.
What constitutes a warranty? (How do I know if my product is still under warranty?)
Please see our Warranty page to learn about which warranty applies to your product and whether your product is still under warranty.
What should I do if I have a problem with my product?
If you are still under warranty, please make sure your product is registered and then submit a Contact Us form so that customer support can reach out to assist you.
If you are outside of warranty, please see the product sections of this FAQ for troubleshooting and helpful resources to assist you with your unit. Your manual also provides troubleshooting and solutions.
If you are in need of a part for your unit after troubleshooting, please visit the Parts page for our available parts. You can search for a part with your model number by typing your model number into the site search bar. It will bring up the item as well as any relevant parts. More information on finding your model number and searching for specific parts or manuals can be found on the Support Page. If you are not able to locate the part you on our website you can visit popular sites such as appliancefactoryparts.com to check their availability.
How do I reach Customer Support?
To reach our Customer Support team, you will want to start by making sure that your product is registered via our Product Registration form.
Once your product is registered, you will want to then fill out a Contact Us form, which allows you to outline what you need Customer Support's assistance for and open a case within our system. Please note that response times for claims are usually between 3-5 business days.
I need to order a replacement part; product is still under warranty.
Please visit our contact us page and complete the support form. Warranty support does require a product registration be completed prior to receiving assistance. To register your product, please visit the product registration page.
I need to order a replacement part; product is no longer under warranty.
All of our parts available for purchase can be found on our website by visiting the Parts page. To search for a part with your model number, type your model number into the site search bar. It will bring up the item as well as any relevant parts. More information on finding your model number and searching for specific parts or manuals can be found on the Support Page. If you are not able to locate the part you on our website you can visit popular sites such as appliancefactoryparts.com to check availability of parts. More information on finding your model number and searching for manuals can be found on the Support Page.
Where can I locate the model/serial number on my product?
The model and serial number should be located on the back of your Masterbuilt® unit on the manufacturer's label.
How do I return something?
We accept returns only on items purchased directly through Masterbuilt® via our website: www.masterbuilt.com. To return a product, please fill out a Contact Us form to where Customer Support can reach out in 3-5 business days to assist with the return process.
Where does Masterbuilt.com ship to?
Masterbuilt.com ships to the 48 contiguous US states. We are unable to ship to Alaska and Hawaii at this time. If you live in Hawaii or Alaska, feel free to check our Find a Retailer page and check with any of our authorized retailers to see if any ship to your area.
Where can I locate a retailer near me?
Where can I get recipes?
My Controller or Fan Isn't Working Correctly
If the fan or controller isn't working see our Component Troubleshooting Guides
- Models 600 and XT Gravity Series (Generation 2) - Component Troubleshooting PDF
- Models 560, 800, 900 and 1050: Gravity Series (Generation 1) - Component Troubleshooting PDF
Shipping Information
Gravity Series®
Do the fire bricks disintegrate?
Are Gravity Series grills wifi app enabled?
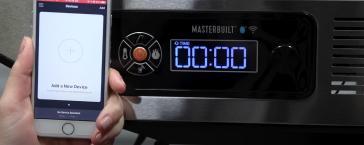
Yes, you can control the grill temperature through the digital control panel or the Masterbuilt App. The Masterbuilt App gives you the ability to control and monitor the grill temperature and meat probe temperature all from your phone.
Do I have to let the charcoal hopper run out before I turn off my grill?
Do I need to preseason my grill?
Yes, it is very important to preseason your grill before cooking. Pre-seasoning helps to burn off any chemicals and oils left over from the manufacturing process.
1300˚FSteps to pre-season your grill:
1. Fill the hopper with charcoal approximately ¼ - ½ full.
2. Start your grill following the START-UP instructions and set the temperature to 250°F (121°C) for 60 minutes.
3. Next, set the temperature to 400°F (204°C) for 30 minutes.
4. After 30 minutes, shut down the grill following the SHUTDOWN instructions.
5. Allow grill to cool COMPLETELY.
6. After the grill has cooled, use a napkin or cloth to rub a light coat of cooking oil on smoke and sear grates, warming/smoking racks, charcoal grate and the inside of the grill lid and body.
7. Then, repeat steps 3-6 at a temperature of 350°F (176°C).
*Frequent seasoning helps to prevent rusting. If rusting occurs clean with a steel brush, apply vegetable shortening and heat as indicated above.
Can I line my racks/grates with foil?
Why is my unit smoking so much? Too much smoke?
Will the grill lose heat when the lid is open?
What is the purpose of the manual pause function when opening the grill lid while cooking?
How do I turn off my grill when I'm done cooking?
*Failure to insert slides will cause remaining charcoal to burn and could cause damage to grill.
*Do not store or cover until the grill has completely cooled.
How do I store my grill when it is not being used?
Fan Issues - See this reference from your manual
Fan or Controller Not Working
If the fan or controller isn't working see our Component Troubleshooting Guides
- Models 600 and XT Gravity Series (Generation 2) - Component Troubleshooting PDF
- Models 560, 800, 900 and 1050: Gravity Series (Generation 1) - Component Troubleshooting PDF
Error codes that people are receiving from their grill and troubleshooting tips
What are the differences in the Gravity Series grills?
| Generation 1 Grills (560, 800, 900, 1050) |
Generation 2 Grills (600, 1150, XT) |
|---|---|
| 3 Piece 16lb Hopper | 2 Piece 18lb Hopper |
| Push Button Hopper Switches | Magnetic Hopper Switches |
| Push Button Lid Switch | NO Lid Switch |
| Steel Manifold | Porcelain Manifold |
| Steel Charcoal Grate | Porcelain Charcoal Grate |
| Controller DOES NOT PAUSE | Controller DOES PAUSE |
Temperature variance vs outside thermometer
The difference in temperature readings between an outside meat probe and the one that comes with a Masterbuilt grill can be attributed to several factors.
- Placement of Probes: The Masterbuilt grill's built-in probe is typically placed in the grill's cooking environment, which might have hotter or cooler spots depending on airflow and heat distribution. An external meat probe, on the other hand, may be inserted directly into the meat and can show a slightly different reading based on where it's positioned inside the meat, as well as how much heat it's exposed to.
- Calibration and Accuracy: The probes could be calibrated differently. The Masterbuilt probe is specifically designed for the grill's environment, and its accuracy may vary based on grill conditions, while an external probe may have a different calibration or sensor sensitivity, which leads to discrepancies in the readings.
Rust - what to do with it and how
AutoIgnite™
What is the temperature range and burn time?
- 250° F = up to 8 hours
- 650° F = up to 3 hours
What accessories are compatible with the AutoIgnite
How long does it take for the AutoIgnite™ to heat up for cooking?
- 5 mins to 225° F
- 7 mins to 650° F
Is the AutoIgnite™ digitally controlled, and WiFi App enabled?
How does the grill control and maintain the temperature?
What is the charcoal capacity?
- 5lbs (2.25 kgs) of Masterbuilt lump
- 7lbs (3.17 kgs) of briquette
How many meat probes does it come with?
Masterbuilt® Lump Charcoal
What is Masterbuilt® Lump Charcoal?
Masterbuilt® Lump Charcoal delivers a delicious charcoal flavor for low temperature cooking and it also has the ability to reach high temperatures quickly & consistently.
- 100% premium hardwood
- Naturally sourced and fired in artisan style kilns
- Ideal for Gravity Series® grills and other charcoal cooking products
- Perfect hardwood blend for all temperature ranges and food types
- Clean burn for optimal charcoal flavor and performance
Where can I buy it?
You can buy the charcoal from Walmart or online at Masterbuilt.com
What makes Masterbuilt® Lump Charcoal unique?
Benefits of Lump vs. Briquette
- 100% premium hardwood No fillers or additives
- Easy clean-up Little ash production
- Lights faster Food to the grill faster
- Use for multiple cooks Burns longer for low & slow cooking
- Burns hotter Get a deeper sear
- Better temperature control Responsive to oxygen, better air flow
How long will it last in hopper?
Where is it made?
Average size of lumps?
We do our very best to provide a high-quality mix of different sized lump charcoal. The size should range from 2-6 inches as to best fit in the Gravity Series® hopper.
Sometimes the handling of bags after they leave our production facility will cause pieces of lump charcoal to break down. However, you should see an assortment of sizes in each bag. Be sure to handle your bag with care when moving and storing. Lump is fragile and has a tendency to break if not handled with care.
What flavor is it? Will there be any flavors in the future?
Is it pre-soaked in lighter fluid (easy light)?
What's the best way to light it?
We recommend using the Masterbuilt® Fire Starters for the easiest way to light your Gravity Series® grill and Masterbuilt® Charcoal.
What is the charcoal shelf life?
How long will it take on average for the charcoal to get started once lit?
Where should I store the charcoal?
How do I extinguish a charcoal fire?
How hot will it get?
Can I reuse any partially burned charcoal?
Masterbuilt® Fire Starters
What are Masterbuilt® Fire Starters?
Masterbuilt® Fire Starters are the perfect way to light your charcoal grill, making start-up easier than ever and reducing the time needed to reach your desired temperature.
- Ideal for Gravity Series® grills and other charcoal products
- Easiest way to light your charcoal grill and reduce time to temperature
- Odorless, smokeless cubes burn up to 1300˚F
- Fire starters light when wet
- Produced from pure paraffin wax
Where can I buy them?
You can buy the fire starters from Walmart or online at Masterbuilt.com
What is the Masterbuilt® fire starter made of?
How many come in a pack?
Benefits of using fire starter? How long does it take to light charcoal?
How many do I use?
Can I use them in an electric smoker?
What is the shelf life?
How long do they burn?
What size are they?
Do they add flavor to food?
What do I do if it won't light?
Can I use them in my fireplace or firepit?
Can I store these outside? What do I do if they get wet?
How long will it take on average once fire starter is lit to get the coals started?
General Smokers
Smoking Times and Temperatures
Should my wood chips be used wet or dry?
If you would like to use pre-soaked wood chips, visit our YouTube channel and view "A Quick Tip with John McLemore: Soaking Wood Chips"
Video: Wet vs Dry Wood Chips for Smoking
Is it ok to use my smoker on my deck/porch/in my garage?
Can I use wood chunks or pellets in my smoker?
What is the best way to clean my smoker?
Video: How to Clean Your Masterbuilt Smoker
When cleaning your smoker, mix 50/50 hot water and apple cider vinegar in a spray bottle and shake well. Apply mixture and clean with a soft sponge. It is very important not to use harsh chemicals to clean your smoker.
Can I use natural gas instead of propane for my gas smoker?
Can I use an extension cord with my electric smoker?
If an outdoor extension cord is needed, it must be marked with suffix letters “W-A” and with a tag stating “Suitable for Use with Outdoor Appliances.” Please ensure cords have grounding terminals in working condition. Cord should exceed 16AWG diameter and be no longer than 25 feet in length. NOTE: Cord diameter is measured in AWG (American Wire Gauge) the smaller the number, the larger the diameter.
How do I pre-season my electric smoker before using it for the first time?
Curing your smoker will rid the unit of oil produced in the manufacturing process. First, make sure the water pan is in place without water in it. Set smoker temperature to 275°F and allow the unit to run for three hours. During the last 45 minutes, add ½ cup of wood chips in the wood chip loader to complete the pre-seasoning process. Power off the smoker and allow it to cool completely. (Note: Never add more than ½ cup of wood chips at a time. Additional chips should not be added until any previously added wood chips have stopped generating smoke.)
Setting Time/Temp for my Electric Smoker through the Masterbuilt® App.
How do I pre-season my propane smoker before using it for the first time?
Curing your smoker will rid the unit of oils produced in the manufacturing process. Pre-season your smoker prior to first use.
Video: How to pre-season your Masterbuilt Propane Smoker
1. Perform soapy water test: Video: How to Perform Soapy Water Test
2. Using a napkin or cloth, rub a light coat of cooking oil on smoker racks and inside smoker door. Make sure water pan is in place WITHOUT water.
3. Fill wood chip tray with up to 1 cup of wood chips and light your smoker. Close door.
4. Let the smoker burn for about 1 hour. Make sure temperature reaches 350°F (177°C).
5. Allow unit to cool completely.
6. Reapply light coat of cooking oil on smoker racks and inside of smoker door.
7. Re-light smoker and burn for 20 minutes.
* Cure your smoker periodically to prevent excessive rust.
How do I pre-season my Slow Smoker Attachment?
Pellet Smoker Tips - See this reference from your manual below:
Pellet Smoker is showing ERR0: Body Temperature Probe not seen by controller (check connections of temperature probe. If still an error replace temperature sensor.)
Pellet Smoker is showing ERR1: Meat Probe Error. Meat probe 1 is not installed, or the meat probe is defective.
Pellet Smoker is showing ERR2: Meat Probe Error. Meat probe 2 is not installed, or the meat probe is defective.
Pellet Smoker is showing ERR3: Err3 is when 450°F temp was reached inside the Pellet smoker. This can happen if the crucible has too many pellets in it from the prime process. Once the controller is turned off (not unplugged) the smoker should burn off the pellets in the crucible. The smoker can then be restarted without the prime, which should help with preventing this error.
WiFi Smoker
What is the temperature range?
Can I control the WiFi smoker with an app?
Can you really get smoke flavor in an electric smoker?
What is the cooking capacity on the Wifi Smoker?
How many meat probes does it come with?
Controller not working
Digital Charcoal Smokers
Digital Charcoal App Overview
Fan or Controller Not Working
If the fan or controller isn't working see our Component Troubleshooting Guides
- Models 600 and XT Gravity Series (Generation 2) - Component Troubleshooting PDF
- Models 560, 800, 900 and 1050: Gravity Series (Generation 1) - Component Troubleshooting PDF
If your Masterbuilt Digital Charcoal Smoker controller is not functioning properly.
Fryers
What type of oil is recommended?
- Canola oil and vegetable oil can also be used
- Do not use olive oil, grapeseed oil, or any oil with a low flashpoint
How much cooking space does the 6-in-1 Outdoor Air Fryer contain?
- A 20 lb. Turkey
- 50 chicken wings (~10 lbs.)
- Has 4 stacking baskets and a poultry basket (5 baskets total)
How much oil does the fryer need?
- Butterball® Electric Fryer: 2 gallons
- Butterball® XL Electric Fryer: 2.75-3 gallons
- Do not exceed the maximum fill line
How long does oil take to get to desired temp?
Can I store oil in the unit?
We do not recommend storing your oil in the unit as this will cause build up and will cause the electrical element to burn out.
Allow your oil to cool completely, strain and store in a tightly closed container in a cool dark place for best results.
How many times can I reuse my oil?
Watch A Quick Tip with John McLemore: Reusing Oil in the Electric Fryer
Peanut oil can be used 6-8 times if properly maintained and filtered after each use.
Do I need to preseason my fryer? How can I preseason my Outdoor Air Fryer?
Yes, it is highly recommended that you pre-season your fryer. This is to help burn off the oils from the manufacturing process.
Step 1- After assembling, remove the cooking baskets and poultry stand from the fryer. Leave the heat deflector installed in the fryer.
Step 2- Plug in the fryer. Power it on. Set your Air Fryer to “Air Fry” at 200F. Let it run for 30 minutes.
Step 3- After 30 minutes, change the temperature to 300F. Let it run for another 30 minutes at this temperature.
Step 4- Change the temperature to “preset.” Let it run for 30 minutes on Air Fry, Preset.
Step 5- Your pre-seasoning is complete. Power off by pressing the power button. Do not unplug the air fryer, as the fan will continue to run for 5 minutes to cool the fryer down. Once the fan has automatically shut off, you may unplug the air fryer.
How do I steam food using the Butterball Electric Fryer?
Video: How to Steam and Boil with John McLemore
Add water to Max Fill line. Water will boil at 212°F (100°C) but to steam set temperature to 375°F (191°C). This ensures the unit will not cycle off and water will continue to boil and create steam. Never allow water to completely evaporate as this can cause the element to overheat and damage the unit.
How do you prepare the turkey for frying?
Watch Video: How to Prepare and Test Your Masterbuilt Electric Fryer
1. The turkey must be completely thawed and dry: rinse the turkey inside and out with warm water or immerse in warm water for no more than 20 minutes while oil is heating
2. Use paper towels to thoroughly dry the inside and outside of the turkey
3. Inject with marinade and/or add dry rub
How long should I fry a turkey?
Watch Video: Butterball Electric Fryer: How to Fry a Turkey
For 8L and 10L fryers, place your turkey breast side up with the legs toward the narrow end of the basket. For 5L fryers, place turkey in the basket, breast side down. Fry your turkey for 3 ½ to 4 minutes per lb. The internal temp should be 165°F in the breast and 180°F in the thigh of the turkey.
How do you season the turkey?
Video: How to Fry a Turkey
Turkeys can be injected with marinade and/or a dry rub can be added to the skin.
How do I know when the set temperature has been reached?
When your set temperature is reached, the Green "READY" light will illuminate.
- Cooking Oil: 375°F (Max Temp)
- Water: 212°F (Max Temp) - boiling water will not get hotter than 212°F
- Boil/Steam: Set temp to 375°F (water is ready when boiling)
Can I replace the battery on my timer?
Yes, it operates on a button cell battery
Can I use an extension cord?
- We do not recommend using an extension cord
- If you must use an extension cord, it must be a heavy-duty cord with a ground
- Use of an extension cord increase risk of entanglement and tripping
- May cause loss of energy and appliance may not heat properly
- Do not operate with damaged cord, plug or after appliance malfunctions or has been damaged in any manner
How do I prevent my fryer from tripping the fuse?
Make sure no other appliances are plugged into the same outlet or circuit.
How do I clean my fryer?
Video: How to Clean the Masterbuilt Butterball Electric Fryer
For XL Fryers:
Video: How to Clean the Masterbuilt XL Butterball Electric Fryer
- Pot and lid: dishwasher safe
- Body: use mild soap and water
- Do NOT allow water or cleaning agents to contact the electrical components
Can I use the 10 Liter XL Electric Fryer, Boiler, Steamer outside?
No, this appliance is for indoor use only. Do not use outside.
Why won't my electric fryer turn on?
Video: Troubleshooting your Electric Fryer
The control panel features a “Safety Switch” that must be mounted properly on the mounting bracket of the outer shell for the unit to power on. The power light will illuminate when the control panel is mounted correctly.
You may need to reset your fryer.
Resetting the Fryer - Video: How to Reset Your Fryer
1. Allow the unit to cool: 2 hours after using water, 5 hours after using oil
2. Remove the controller from the main body
3. Locate and press the "Reset" button on the rear of the controller with a toothpick
Air Fryers
Can I use the 6-in-1 Outdoor Air Fryer indoors?
No, this air fryer was designed specifically for outdoor use.
How do I adjust the temperature on my Outdoor Air Fryer?
The Outdoor Air Fryer comes with preset temperatures designed specifically for optimum cooking at each function. You can also change the temperature knob to cook at your desired temperature.
I can't see any smoke when I put wood chips in my 6-in-1 Outdoor Air Fryer
Make sure you are using a cook function that can smoke. These cook functions are: air fry, roast, bake, and convection.
Make sure you are using the preset temperature on the temperature knob.
Make sure you put in the woodchips BEFORE preheating the fryer.
It is intentional to have subtle smoke. This is to allow a hint of smoke flavor to your foods.
If your woodchips are completely cold and unburned after a cook longer than 30 minutes, your bottom heating element may be not working.
Masterbuilt® App
Digital Charcoal App Overview
Masterbuilt® app requirements and versions, including Gravity Series®
"How To" Videos
Smoke Hollow
What should I clean my cooking grids with?
Porcelain coated cooking grids can be cleaned with a brass brush. Stainless steel cooking grids should be cleaned with soap and water and a soft cloth.
Do I need charcoal in my firebox?
We suggest a wood fire with a nest of charcoal on top with woodchips set in the middle.
My unit keeps producing black soot that's getting on my food. Why? And how can I fix it?
If you are experiencing this issue you may notice that you have a large yellow flame from your burner. If you see this your burner may not be getting enough air. Your flame should be 80% blue and 20% yellow. To adjust the air flow, turn the small metal cap located at the end of your burner tube that is located directly behind your control panel.
The flame goes out a few minutes after lighting my unit, or sometimes I am unable to adjust the flame from high to low.
Our regulators have a pressure safety mechanism built into them and when the unit experiences this issue it usually means the safety mechanism has been triggered and produces low flow. To reset your safety mechanism, turn the unit OFF and detach your tank from your unit. Allow it to sit detached for 5 full minutes. After 5 minutes reattach your unit to the tank but do not turn the valve on your tank on full. Only turn it a quarter to halfway on and then light your smoker. After your unit is lit you may increase the gas on your tank to full ON.
What are your covers made of?
Our grill covers are made from black canvas with a PVC lining. Smoker covers are made of black vinyl and pressed cotton. Covers are not warranted due to exposure to various weather conditions. We recommend using a cover to protect your product from dust and debris.
Can your products be converted to natural gas? Do you sell a conversion kit?
Our units cannot be converted to natural gas. Our units are tested and designed to operate on LP gas and our company does not do any testing with natural gas. We do not sell a natural gas conversion kit nor do we recommend the use of natural gas with our products.
What is the best way to store my smoker or grill?
Units should be stored in a covered area where they are not subjected to the outdoor elements.
How do I get the wood chips to produce smoke when using my electric smoker?
We recommend that you preheat your smoker on HIGH with your wood chops placed close to or directly above the heating element with no water or food in the smoker. Once wood chips begin to smoke adjust the temperature to the desired cooking setting, then add food and water.
How should I season my smoker?
Pre-seasoning your smoker will rid the unit of oil produced in the manufacturing process. First, make sure the water pan is in place without water in it. Set smoker temperature to 275°F and allow the unit to run for three hours. During the last 45 minutes, add 1/2 cup of wood chips in the wood chip loader to complete the pre-seasoning process. Power off the smoker and allow it to cool completely.
What wood flavors should I use when smoking food?
This depends on personal preference and may require trying a few different flavors to determine what you like best. Three popular choices are Hickory, Mesquite and Apple.
Can I use an extension cord and, if so, how long?
Yes, extension cords can be used so long as they are no more than 10 feet long, are between 12 and 16 gauge, and are graded for outdoor appliance usage.
My smoker is running too hot. How can I reduce the temperature to below 250 degrees?
Our smokers are designed to operate between 200-350°F. If you are in this range your smoker is functioning as it should. These temperatures will vary for each smoking session based on the ambient temperature outside and the amount of food you are smoking.
I am not getting smoke, what do I do?
- Avoid use of an extension cord. If an extension cord is a must make certain it is graded for outdoor appliance usage, not just outdoor usage. If used, extension cords must be 3 prong, 12 to 16 gauge, and no longer than 10 feet.
- Chips can go stale. Stale chips will scorch but will not ash. Chips can be washed in soapy water and dried or replaced. Brand new chips can be stale.
- Open air flow will assist the wood to ignite.
- Use 1 cup of water or less. More than that can over-saturate your chips, raising their ignition temperature.
My electric smoker is not heating.
1. Power on the unit. Make certain the ambient temperature reading is within 10 degrees of the actual outdoor temperature.
2. Model D4015: Press the “Hot Smoke” button.
3. Press temperature. Adjust the temperature by pressing the up arrow over and over. Holding it down can cause a disconnect. Once the desired temperature is reached press temperature again to lock it in.
4. Press the time button. Adjust the hours you require. Press time again. Adjust the minutes required. Adding minutes is always suggested so that step is not missed. Press time again to lock it all in.
5. Model D4015: Press the “Hot Smoke” button again. The heating light should illuminate.
6. If this does not do the trick further troubleshooting is needed. Please contact us.
Why is my Bluetooth app not working?
The Bluetooth feature has been discontinued and usage of the app may cause disconnect between the unit and your phone. For best results, delete the application and use the control panel on the main unit.
I'm having trouble getting my sear burner to light. Any tips?
Turn your gas on and wait 20 seconds, allowing the gas to build up before striking the ignition button.
Why is my stainless steel tabletop grill so hot?
High temperatures are normal. The temperature range is 500-755°F.
Some units are specifically manufactured to be used with 1 lb propane bottles. Attaching an aftermarket hose to use a full-size tank will cause the unit to not attain proper gas pressure. Always ensure you are only using the 1 lb propane bottles for those units.
How do I install the "L" shaped tube on the hose?
Check the L shaped bar. It should be secured by a 1 inch brass fitting to the top of the sear burner valve.
In the event this is not the case:
1. Remove the sear burner valve as described in your manual
2. Remove the brass fitting from atop the valve
3. Lay the black L shaped tube across the valve, aligning the hole on the top of the valve and in the L tube
4. Reattach the brass fitting over the tube, tightening in place
5. Perform a leak test as described in your manual. If no bubbling is present reinstall valve on unit. Otherwise contact customer service.
Can I seal my grill?
No, we do not recommend any aftermarket modifications. Modifications of any kind made to our grills will automatically void the warranty.
Accessories
Will the Masterbuilt Pizza Oven fit my grill?
-
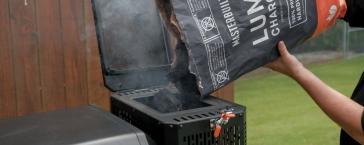
Troubleshooting
Got a question? Need a helping hand? We've got you covered.
-
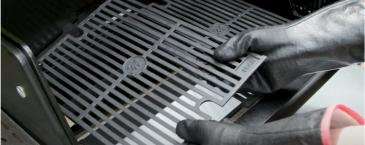
Replacement Parts
Need a new part for your Masterbuilt grill, smoker, or fryer?
-
Warranty
View the warranty details of your Masterbuilt BBQ or smoker.
-
Product Manuals
Didn't think you needed it? Threw it out? Thought so. Don't worry, it happens.
-
Product Registration
Protect your investment. Register your Masterbuilt product.
-
Contact Us
We're always around if you need. Submit a request, and we'll get you back up and running.


